Archive
Front suspension coming together
Now that I’m starting to put this together the project is much more enjoyable. Everything is so clean I almost don’t need to put the overalls on! I had to muck around a bit with the steering rack and when it was finally in I realised that the notch out of the steering shaft was out 180 degrees! The rack had been rebuilt and I suppose it;s an easy mistake to make. Anyway, no big deal – only took about 15 minutes to rectify.
The front end is almost all done. Just got to get the 3 hard lines made up then install. The fuel pump bracket also needs mounting and when this is complete I can fit the stone tray and move to the rear. I’d better get the wheels ready!


Refinished Parts

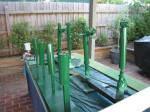
Not a paint booth but good enough for this job!
It’s been a while since the last post. Since the most recent update I have been slowly completing the refinishing of all the various bits and pieces. I’ve done alot of it myself but in the end I had Phil at Auto Coupe look after the important mechanical parts. In particular he did the following:
- Split calipers, blasted, replated, assembles, baked and fitted rebuild kit. One piston was replaced but the others were OK. These will work like brand new.
- Blasted front hubs and coated with clear. New wheel bearings packed and greased. New rotors to finish off.
- Blasted trailing arms and coated with clear. New wheel bearings, new handbrakes shoes. Hubs also blasted and new bushes fitted where the trailing arm attached to the torsion bar tube. Again, as good as new.
- Spring plates blasted and replated. Old bushes removed and new urethane ones fitted. I had asked about squeaking for this style of bush but Phil assures me that use of the correct grease and they’ll be no issues. There was a bit of surface corrosion that you can’t completely remove but the performance is not affected. To me they’re still an 8.5 out of 10.
- Camber plates cleaned and painted. Not replated because of the attached rubber bush.
- Front control arms blasted and repainted. New bushes (urethane) fitted. Phil also fitted the ball joints to make my life a bit easier on the assembly.
- Blasted, cleaned and replated bolts, clips and various other hardware items. Phil then bagged and labelled which I assure you is much appreciated!
Still to come from Phil are the powdercoated sway bars, stone tray, crash bar and tow plate. He is also supplying urethane sway bar bushes all round.
All the other parts are close to done. I have stripped and repainted the struts. My first real project with 2K paint and the results are pretty good – certainly good enough for the struts and rear shocks.
Other parts such as the washer bottle, fuel overflow bottle, fuel filler pipe, rear fender brackets have been done. No pics but they’ll be shown when I start putting the car back together.
At the moment I am refinishing the oil tank (in POR15) and at the same time will replace some of the oil lines – the old ones are looking every bit of their 27 years! I need new ones when the SSI’s go on so I am doing it now while everything is apart. Yet another ‘while you’re there’ project.
Enough words for now. The pics do the talking anyway.
-
- Not a paint booth but good enough for this job!
-

- Close up of front strut. Not bad for 1st ever 2K paint job.

-

- Front hubs came up the best. Look new to me. Very happy!

-

- A Arm blasted and painted. New urethane bushes fitted and ball joints torqued up.

-

- Trailing arms blasted and coated. New bushes pressed in.

-

- Rear hub looks great. New handbrakes shows as well.

-

- Sprin plates blasted and replated. New bushes!

-

- Bolts and hardware bagged up. Camber plates and drop links painted.

-

- Brakes split, blasted, plated, baked and new seal kit.

I like shiny things….
Now on my 3rd delivery of new parts. Thought I’d lay them all out as a record of what I am replacing. This is all new stuff, some of it for cosmetic reasons, some of them are direct replacements (OEM of course) and some are upgrades. The main upgrade are the torsion bars. On advice I have gone for a 21/28 combination. Apparently this is as hard as you want to go for street and will shift the balance toward oversteer – the point of this is to compensate for the factory dialed in understeer. Hopefully this doesn’t make this car too tail happy!! Before I install the rears I’ll have to see how the upgrade from 24 to 28 affects the spring plate angle. Could be a thread topic of Pelican.
There’s plenty more new bits like bolts, screws, nuts, washers but I am yet to add these top the glory box.


Project – Front Suspension – Updated 8th June 2010
UPDATED 8th JUNE 2010
Got nearly the whole front end out and disassembled. Cutting out the ball joints was much easier with the strut out, felt more like a surgeon than a butcher. Here are some pics of the progress. You can see that there is a fair bit to clean up so I am looking forward to the ‘after’ pics so I can show off all the hours this is going to take.
Note the front torsion bars – I have pronounced them ‘dead’ and will be using the opportunity to up the stiffness a notch, likely to get a pair of 21s – good for street but a bit stiffer than OEM.
———————————————————
This is going to be a long post and may take me several weeks to complete!
The objective here is to replace all bushes and clean/renew everything under the front of the car. This includes refinishing struts, calipers and hard brake lines plus replacing hoses, rusty brackets. Major components such as A arms and cross member will be blasted and refinished. Big job…
First things first I have to dismantle the suspension and will post pics in the next few days as to where I am with it at the moment. I have unbolted most of the major components except the struts – can’t do this until brakes are disconnected of course. All went relatively smoothly except for the goddam tie rod ends. RH side dropped straight out but the LH was a major b!tch. I ended up with a 3 claw puller but had to destroy the boot to get enough purchase on it. Anyway – a new end is not that much of a concern in the scheme of things.


