Archive
At the Panel Shop – UPDATE 27th August 2012
UPDATE – 27th August 2012
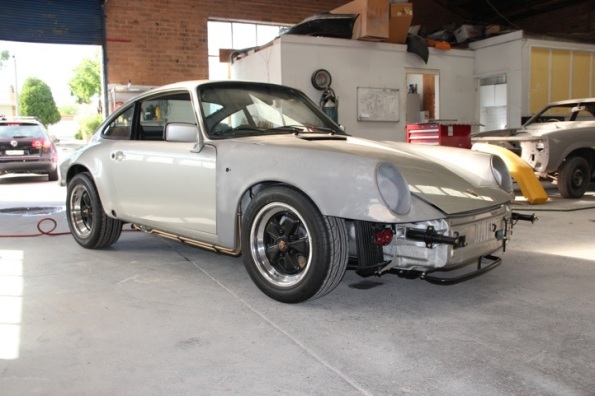
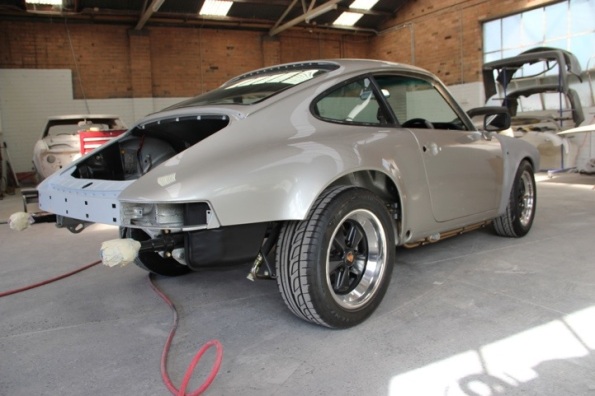
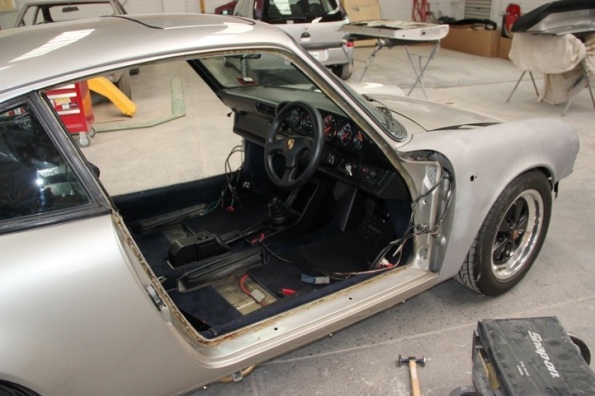
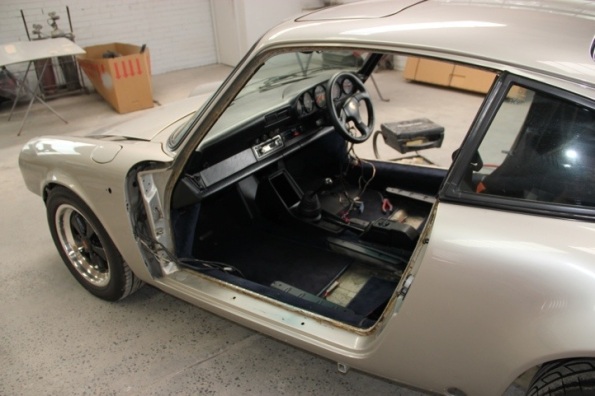
A fair of time has passed since the last update. I was away for 3 weeks plus a few other distractions got in the way. Car is back and I have just finished the assembly. Just needs the engine. Here’s the pics.
UPDATE – 29th May 2012
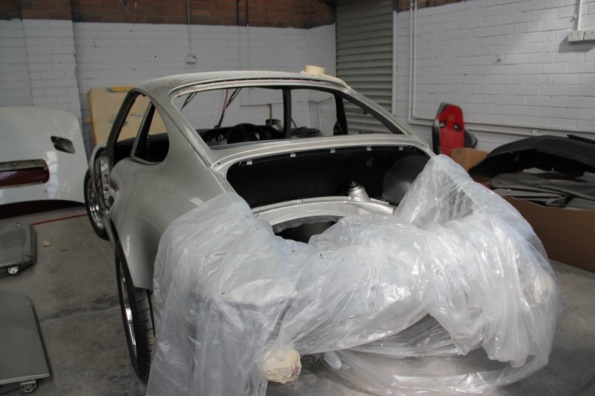
Here’s some pics fresh out of the oven. The original plan was to rub back to ‘glass’ but the job is so nice off the gun we are going to leave it. It actually looks a bit more natural with a slight bit of the peel. More pics when I start to get it assembled.
UPDATE – 25th May 2012
It’s coming along now with top coat due any day. The following pics show some of the prep. At this stage car has been rubbed back with some areas taken back to metal – as there was way too much product from previous ‘touch ups’. There was so much on there that the paint was cracking in spots, especially under the rain gutters. It’s all been sorted now and the car is virtually ready for primer filler. These guys are working fast now!
Good news is that nothing nasty has been uncovered, just the excess product which has been rectified.
UPDATE – 17th May 2012
First update in about a month but there has been plenty going on in the interim – I’ve just been lazy updating the blog. There’s changes with the bodywork, engine, transmission and interior but I’ll post updates separately. For now it’s the body work.
The car currently sits awaiting a final coat of primer-filler and then the whole car will be rubbed back and then colour coated. Colour is probably about 2 weeks away. Here’s some pics but I’ve added a bit more text after the images.
To date the guards have been prepped. I ended up replacing the RHD front guard as the origianl had some rust and rather then attempt a repair it was easier and more cost effective to replace it. I also replaced the rear bumper for the same reason.
The cracking in paintwork around the rain gutters was a result of too much pain on previous repairs. This area was brought back to metal and it was discovered that the car had more than one previous paint job. It appears that each owner had a go at making the car look as good as new. The end result was too much paint and so the rub down will sort this out – this has partly caused a delay longer than expected. I’m confident with Frank who is doing the job, he knows I want a top job and he is working accordingly. We’ve discussed how he will paint the panels and the end result is that the jambs will be done and then the entire car painted with panels attached – this came from consultation with his sprayman and the fact the car is silver metallic.
Other minor points are that the areas that scared me the most were the sills – but they are OK. I had some polished sill guards and I suspected they were covering up some nasty surprise. This wasn’t the case which was a huge relief. When the car goes back together I’m putting the factory black rubber ones on – less bling and more class in my opinion.
UPDATE – 12th April 2012
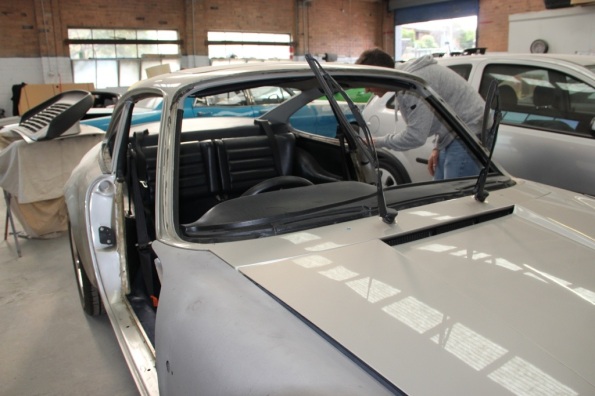
Dropped in the collect the window trim which will be powder coated, along with the door handles and other external trim work. I was a little worried what it would look like with the windows out, in particular potential rust around the front windscreen. The was also a spot at the top of the driver side rear window but this is fine. A bit of cleaning back and it will be good. Not really worth pics but I thought I’d add these.
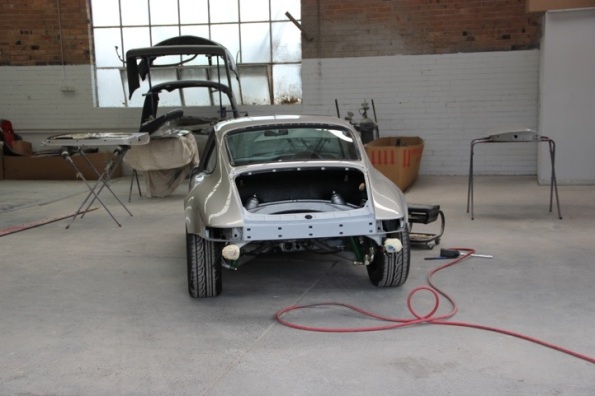
The car is now in the hands of Frank, who is going to fix up all the small blemishes and give the car a full respray. The pics make the car look good already butplenty are small issues I want fixed. Door jambs are rough (previous respray), rear quarters need to be reblocked, couple of small runs, some chips, a couple of small parking dents, and refinished lower panels all add up to the full respray.
Some before pics -after spending a couple of hours removing doors and mirrors.
Exterior Paint – The Unplanned Project….
With so many ‘while you’re in there’ projects going on I have finally surrendered to getting the exterior redone. It’s not that it’s bad or actually really ‘needs’ doing but it was always on the car and it seems like a more efficient time to do it. I had stripped back all the lower panels as they were a bit worse for wear so they needed painting anyway. The dilema I had was with colour matching, especially for a metallic silver.
The colour of the car as it is does not match the formula colour provided by the local Glasurit supplier. This is what I had purchased for the wheel wells, engine bay and front boot. I knew it was off but as the exterior was to be painted at some point I wasn’t concerned. I then had some paint colour matched for the lower panels (fender extension, valance’s, bumpers).
When I thought about it it didn’t seem to make sense to paint it, only to strip it back and repaint again sometime in the next year or 2. With this I contacted a local paint guy who I’ve done some other work for and he came over for a look. A couple of days later he’d prepared a quote based on rub back and paint but also included gapping the panels. I would be responsible for dressing up the bumpers with trim and putting back all the lower panels. No problem..
The quote was very agreeable and so it’s booked in. The car will be in mid March and hopefully ready mid April. I contacted the mechanic and he said the motor and trans will be done about then so the timing is good.
When it’s all done, it should be pretty much a full resto – with a paint job I can love! Here’s pics of the stripped and etch primed panels. They’ve since had Wurth SKS on the right parts so nothing more for me to do – just get them to the painter. I’ll be stripping the bumpers and rear lid hinges but that’s about it.
Front Boot Restoration – Update 23/10/11 – Complete
UPDATE – 23rd October 2011
With the fuel tank in the front boot is now 99.9% finished. I’m pretty happy with it. The fuel tank had previously been repaired with metal patches so I smoothed the edges of the welded patches as best I could and recoated. 4 hours on the wire brush to get it back to metal was mind numbing to say the least!
UPDATE – 12th September 2011
Paint decal just got back from the printer. I’m pretty happy with the result, not perfect but very close, certainly close enough for this application.
UPDATE – 26th August 2011
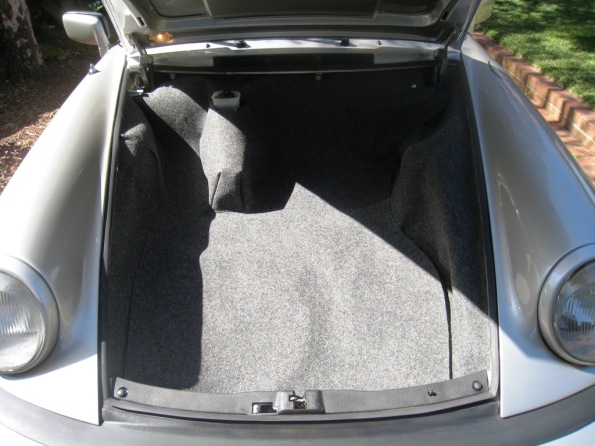
Bar the fuel tank and bonnet seal I finished off the front boot today. I’m very happy with how it’s come together.
Here’s some pics. Note the Y connector which is installed to allow fresh air through the a/c dash vents.
UPDATE – 21st August 2011
Inch by inch….. Put the bonnet lid back on today. Also have tidied up most of the wiring and the lare part of the ventilation system back in – amazing how much grime in the distributors. Hoses have been ordered plus I found a ‘y’ connector so I can divert some fresh air into the dash vents now the A/C has gone. It will compromise flow to pasenger side but we’ll see how it goes. If it’s not up to standard I’ll work out another solution.
UPDATE – 11th August 2011
Not too much to report but starting to assemble the front boot. Here’s a pic of the early stages of tidying up the wiring.
UPDATE – 4th August 2011
Finally got some more real progress. Been waiting for some warmer weather to paint the front boot plus my weekends have been jam packed lately.
I’ll let the pics tell the story but in short the process was cleaning up the surface which involved removing that tar around the shock mounts. A bit more minor repair work and then hit it with high build primer. The front section had some SKS applied then time for colour. I’m using Glasurit Line 55 – beautiful quality paint.
UPDATE – 13th June 2011
Made some good progress today. Did most of the prep work, just a few more areas to cover then final clean, mask and prime. I’ll be applying Wurth SKS around the front – just a light coat or 2. The rest will get some light priming and then colour. When this is done I’ll tackle the tank abd can then start assembling. I purchased some rolls of black fsbric tape which I’ll use for the wiring – much nicer and OEM looking than PVC tape.
With the suspension, brakes and rest of the underbody now under control I have diverted my attention to the front boot. I had intentions of doing this later but I figured now that the car has been off the road for 12 months another month is fine.
Ideally I would completely remove everything but it’s just not practical for me to do this. I am drawing the line and not removing the dash ‘bits’ including the wiring. Instead I have removed most of the plugs, hoses, etc and will mask it all back. I’ll try and spray so that there is no hard line so that it blends as much as possible. The blend area will be covered by the heater components and aluminium cover anyway, plus the whole thing gets covered in carpet so it’s not really going to compromise the job. One day I might do a complete ground up, bare metal, rotisserie resto so it can wait till then – although it will probably be on another car.
Here are some before pics plus some images of what’s been removed so far.
So much for just changing bushes!
I keep saying this but really my suspension project is so much more than a few bits of new rubber. There are so many ‘while you’re in there’ extras going on I am not sure if I should have just turned this into a roller and had it re painted first.
The idea of cleaning the wheel wells and underbody, doing a few spot repairs and spraying with aerosol top coat has gone out the window. I have been convinced through multiple discussions that the only way to paint is 2 part – this means getting a compressor and gun. The result will be worth it because I will then have the right tools to do the engine bay and valance panels. I can also do 2 part primer so the result should be much better. I may even finish my wheels in 2 part rather than VHT Wheel Paint although I am definitely not starting that until I get this car on the road again.
Back to topic, I started removing all the bits and pieces from the front wheel wells which involved removing the front valance (which I wasn’t expecting). I am talking mainly about the washer reservoir which needed cleaning out really badly. Whatever was in there had died and not gone to heaven! With the valance removed I could see a previous rust repair that seemed OK but not really cleaned up as much as I liked. There was also a bit of surface rust going on that I can’t get to without removing the guard. I haven’t removed the guard yet but it’s gonna happen. I’ll then get the wire brush in everywhere, coat with POR15 and the problem should be sorted.
The driver side story is a bit different. Although more costly it’s not so scary because the tub is fine. No rust thank goodness. The guard itself is a bit dodgey with enough rust behind the panel to warrant a replacement. I am definitely not tackling this project at the moment so I will leave the guard on and address it later. When I get around to doing an exterior respray this will form part of the ‘to do’ list. Hopefully I can get another couple of years out of it although some bubbles are appearing under the headlight.
When I do finally get to an exterior respray I plan to strip myself (ie. windows, most of the interior, trim and bolt on’s like light housings, etc) and get to a pro to finish. I will tackle the driver guard rust then plus I also suspect there will be some work required around the door sills. I’m not scared of this though becuase nothing at this stage looks too bad.
Here are some pics – the rust you can see on the LHS part of the tub looks worse than it really is. A grind and proper treatment should sort it out. By time it’s coated in POR15 and new rubberised undercoat applied it should be as good as new. I am not trying to hide repairs (otherwise I wouldn’t add this post!) but I am trying to finish it off so it looks new and repairs are not visible.


